Since the application runs as a web application, there is no additional software needed for installation. If you currently use a label printer with sticky label paper, you have the equipment necessary to process these labels. Please see the documentation below with instructions for use, recommended procedures, and printer settings.
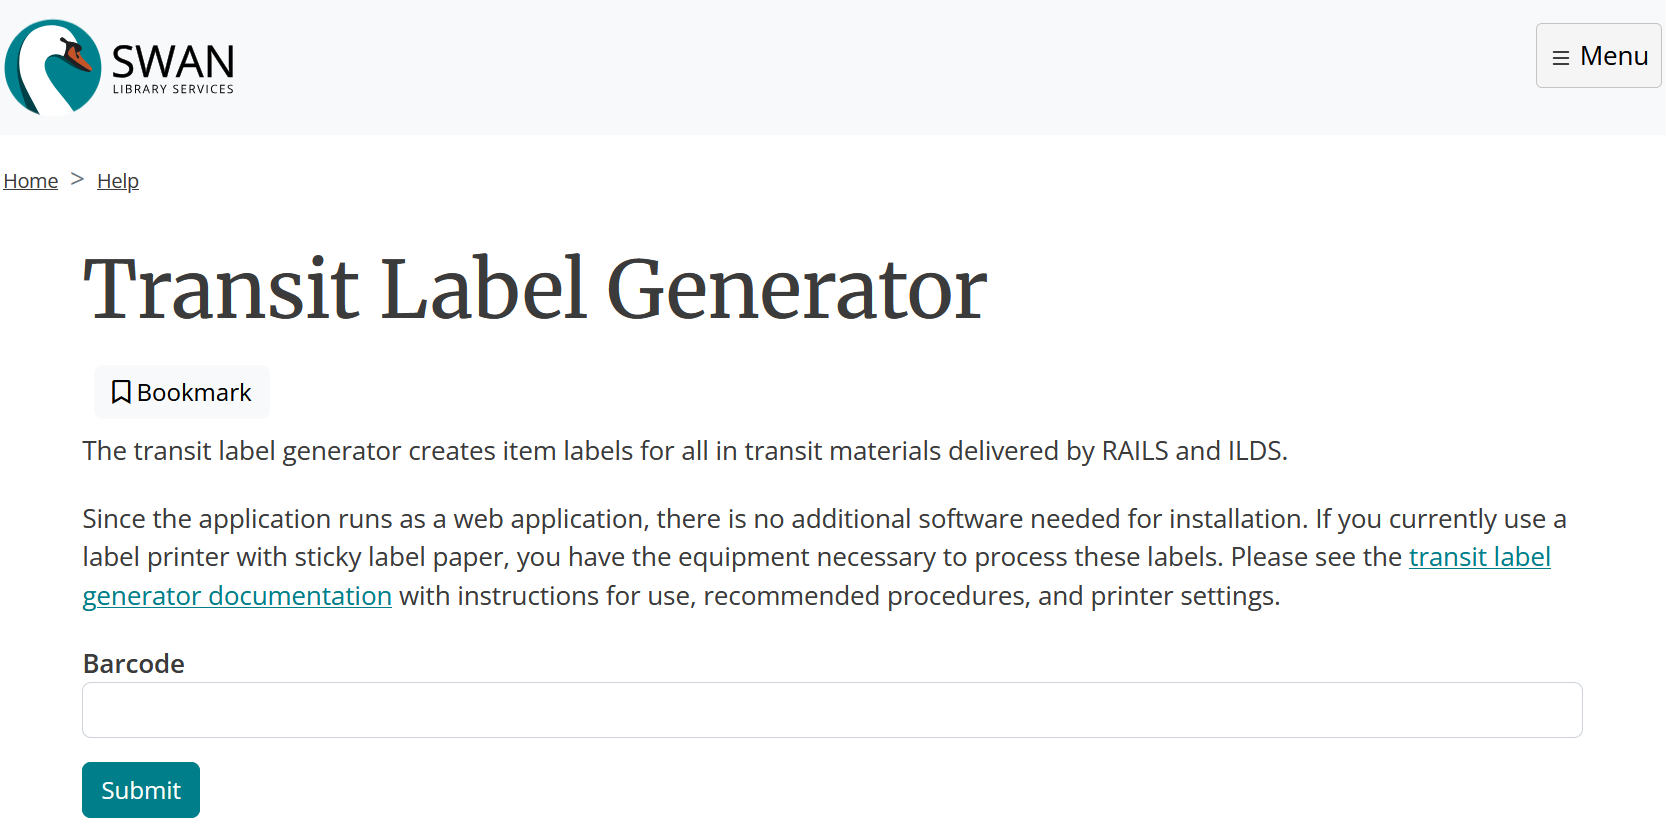
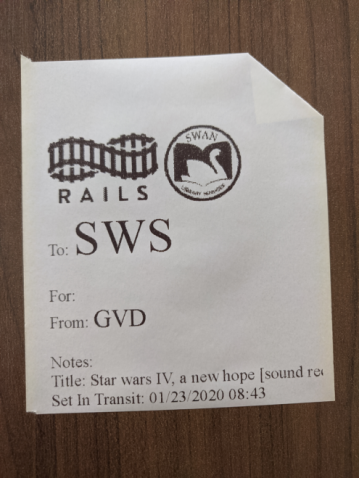
The transit label generator creates item labels for all in transit materials delivered by RAILS and ILDS.
Using the Transit Label Generator
You can use the transit label generator to print a label instead of hand-writing one when you set an item to in transit. This helps reduce the number of incorrect and ineligible routing slips. A reduction in these errors will help to ensure patrons receive their requested material as quickly as possible. This tool can be used to print transit labels for any in transit item.
Creating transit labels
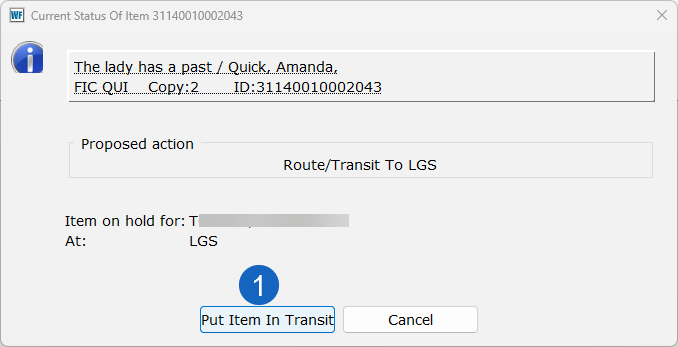
- Checkin item, Click Put Item in Transit
Image:
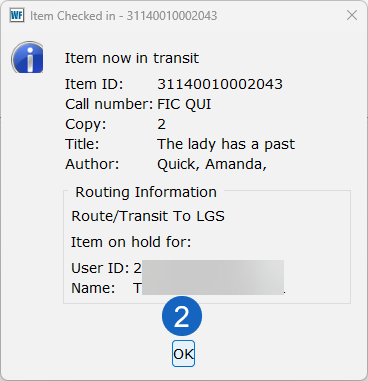
- Click OK
Image:
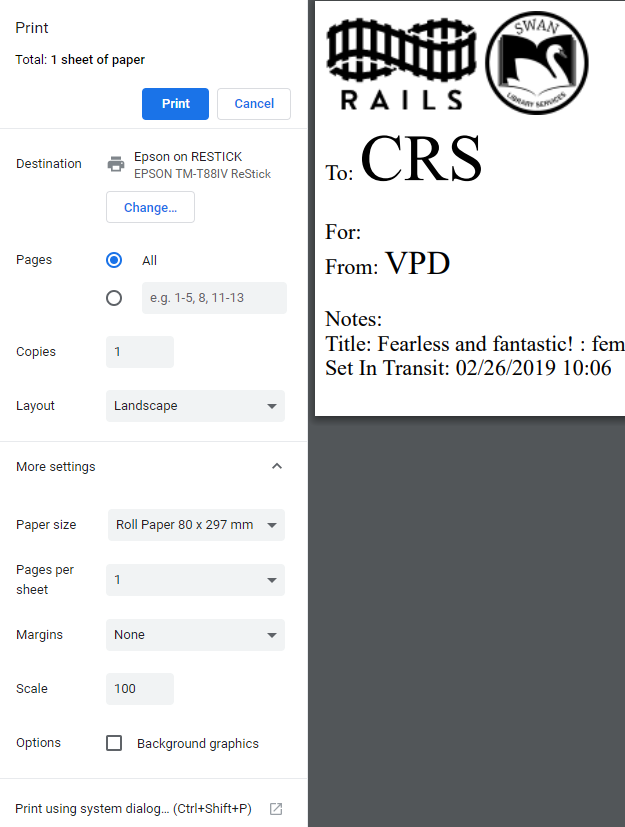
- Open the Transit Label Generator and scan the item barcode.
- Select printer, if necessary, click Print.
Image:
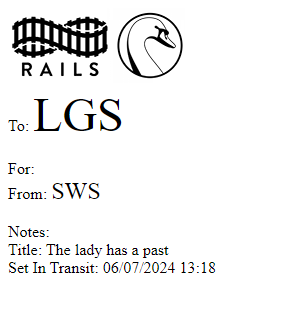
Image:

NOTE: Depending on your browser, your Print Dialog Box may look different.
Best Practices
- For easier removal at the destination library, fold under one corner of the label before applying to materials.
- Depending on your workflow and access to sticky label printer from the workstation checking in material, you can work between Symphony Workflows and a web browser open to the transit label page to print labels as each item is processed in WorkFlows.
- Alternatively, consider consolidating items requiring transit labels in a designated area. Periodically, or at designated times of the day, scan the barcodes of the series of items using the Transit Label Generator, print the labels, affix them to the materials, and add them to your transit bin.
Printer setup and configuration
- SWAN's recommended peripherals
- How to configure receipt printers in WorkFlows
- Use the browser settings to help with proper label size and cut-off
Browser settings
Google Chrome
- All settings are done at the print dialog screen.
- Select your printer and change Margins to None.
- For extra paper savings, you can change Layout to Landscape.
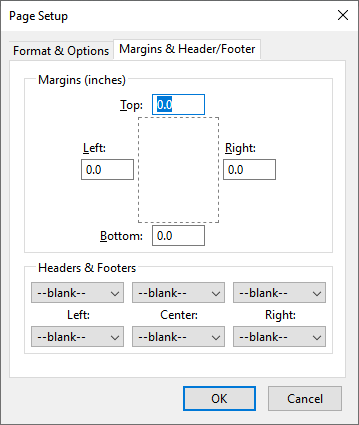
Mozilla Firefox
- Press Alt to see the menu bar.
- Click on File, then Page Setup.
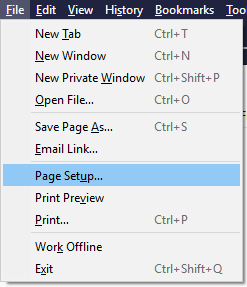
- Select the tab Margins & Header/Footers.
- Change all margins to 0.0 and set all headers and footers options to --blank--.
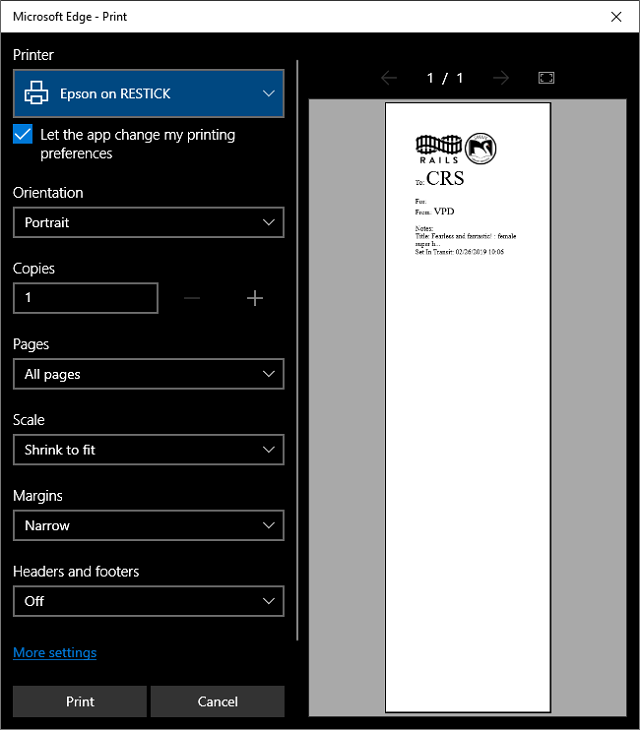
Microsoft Edge
All settings are done at the print dialog screen.
- Select your printer, change Margins to "Narrow," and change Headers and footers to "Off."