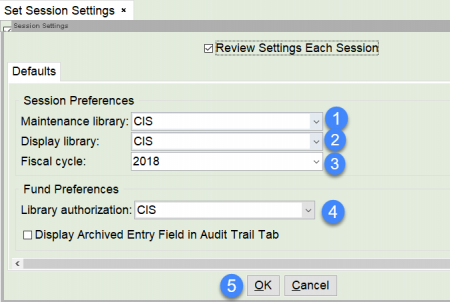
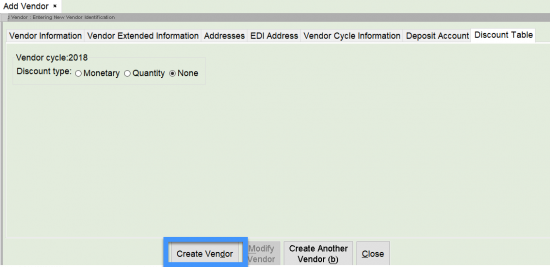
Main Content

Symphony Acquisitions Configuration, Funds, and Vendors

How to configure session settings, vendors, and funds for acquisitions. 

Funds & Vendors

Session settings

Session settings must be set before you begin working with Acquisitions. Setting these defaults will make it easier when searching for funds, vendors, and orders.​

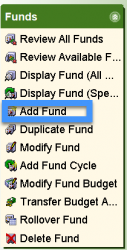
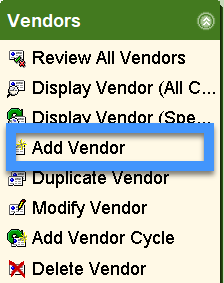
You will first select the Acquisitions Module, then select Session Settings in the Common Tasks wizards group.

  1. Select your library from the drop-down menu.
  2. Select your library from the drop-down menu.
  3. Select the fiscal cycle you are currently using.
  4. Select your library from the drop-down menu.
  5. Click OK.

Acq set session settings tab

Acquisitions funds can be as general or granular as you need. Some libraries may only use one fund for all orders they create. Other libraries may have multiple funds for each budget line in the materials budget for the library. To use the Acquisitions module to create orders you must create at least one fund.

Adding a fund

Select the Add Fund wizard from the Funds Wizards Group.

acquisitions add fund wizard

Fund Information tab

  1. Enter an ID for the fund. The ID should not be changed once it is set.
  2. Enter a name for the fund.
  3. Enter an account number if you have one.
  4. SWAN is currently using Levels 1–3; make any selections you wish to use for displaying and/or reporting on funds.

acquisitions fund information tab

Fund cycle information

  1. Enter the budget amount for the fund.
  2. Adjust the Encumbrance and Expenditure fields as necessary. Note: if you uncheck the Ordering allowed and Paying allowed boxes you will not be able to use this fund for ordering.

acquisitions fund cycle tab


Extended Information tab

  1. Enter any Comments or Notes you wish for the fund. These fields can be helpful for additional information about the fund. Reports can be run by Comments or Notes.
  2. When you have finished filling out all fields necessary, click Create Fund.

acquisitions extended information tab

Duplicating a Fund Record

You can use the Duplicate Fund wizard if you have multiple funds with similar information. 


Select the Duplicate Fund wizard from the Funds Wizards group.
Acq_duplicate_fund_wizard.png

Search to find the fund record you will be duplicating. If there is more than one fund with the search criteria you enter, you will receive a list of the funds. Select the fund then click Duplicate this Fund. If there is only one fund it will open the record.

  1. Enter a new Fund ID.
  2. Enter a new Name.
  3. Fill in the fields in the remaining tabs as described in the Adding a Fund process.
  4. Click Duplicate This Fund.

Acq_duplicate_fund_tab.png

Making changes in a fund record

Select the Modify Fund wizard from the Funds Wizards group.


Acq_modify_fund_wizard.png

Search to find the fund record you will be changing. If there is more than one fund record with the search criteria you entered, you will receive a list of the funds. Select the fund then click Modify this Fund.

  1. Review the tabs and edit fields as needed. Do not change the Fund ID.
  2. When you have finished updating any necessary fields click Modify this Fund.

Acq_modify_fund_tab.png

Create and modify vendor records in WorkFlows Acquisitions using these step-by-step instructions. 

Adding a vendor

Select the Add Vendor wizard from the Vendors wizards group.

Acq add vendor wizard

Vendor Information tab

  1. New ID:  This required field will accept up to 20 characters but must not contain spaces.
  2. Name:  This optional field will accept up to 70 characters and may contain spaces.
  3. Customer number: This optional field is used for the customer number your vendor assigned your library. It will accept up to 20 characters and is searchable. Customer number is required for EDI configuration.
  4. The Ordering and Paying allowed boxes default to checked. If you uncheck them, you will not be able to create an order or pay an invoice with the vendor.
  5. Groups 1 – 3 are optional statistical categories. Group 1 is the only group that is active and is used to identify the type of vendor.

Acq vendor information tab

Vendor Extended Information tab

Notes and comments only display to staff and can be used for running reports.

Acq vendor extended information tab

Address tab

  • There are 3 addresses available in the Addresses tab to allow for separate contact information for Accounting, Ordering, and Service.
  • If you only use one address for your vendor, you can fill in the information in Address 1.
  • If you want to email your vendor via reports, you must fill in the EMAIL field on this tab.

Acq vendor address tab


EDI Address tab

Fill out the fields on this tab if you intend to use EDI ordering and/or invoicing with this vendor. This information can be obtained by viewing the SirsiDynix Symphony Acquisitions training guide and by consulting with your vendor. Please open a ticket for assistance with EDI ordering and invoicing.
 

Vendor Cycle tab

  • The Order claim period is the number of days an order can be outstanding before a claim will be generated.
  • The Order cancel period is the number of days to wait before you cancel the order sent to the vendor.
  • You may leave these fields blank if you do not plan on using WorkFlows for your claiming and/or canceling.

Acq vendor cycle information


Deposit Account tab

If you have a deposit account with this vendor, enter the amount of your deposit.

Acq vendor deposit account tab


Discount Table tab

If you have a discount with your vendor, select the appropriate bullet. WorkFlows can calculate monetary or quantity discounts.

Acq vendor discount table tab


Create vendor

  • When you have finished adding vendor information, click Create Vendor.
  • If you have more vendors to add, click Create Another Vendor.
  • If you are finished, click Close to exit the wizard.

Acq create vendor tab


Duplicating a vendor record

You may need multiple vendor records for the same vendor, for instance, you may have a separate account for processing items or one that gives you a different discount. If your library uses EDI ordering and invoicing, you must create one vendor record for each EDI vendor account. You can use the Duplicate Vendor wizard to create the separate vendor accounts.

  • Select the Duplicate Vendor wizard from the Vendors Wizards group.

Acq duplicate vendor wizard


  1. Search to find the vendor record you will be duplicating. If there is more than one vendor with the search criteria you entered, you will receive a list of the vendors.
  2. Select the vendor.
  3. Click Duplicate This Vendor to open the vendor.

If there is only one vendor with the search criteria you entered it will open the record.

Acq duplicate vendor part 1


  1. Enter a new Vendor ID.
  2. Enter a new Name.
  3. Update the account number for this account (if applicable.)
  4. When you have finished updating all other fields Click Duplicate This Vendor.

Acq duplicate vendor part 2


Making changes in a vendor record

Select the Modify Vendor wizard from the Vendors Wizards group.

Acq modify vendor wizard


  1. Search to find the vendor record you will be changing If there is more than one vendor with the search criteria you entered, you will receive a list of the vendors.
  2. Select the vendor.
  3. Click Modify This Vendor to open the vendor.

If there is only one vendor with the search criteria you entered it will open the record.

Acq modify vendor part 1


  • Review the tabs and edit fields as needed. Do not change the Vendor ID.
  • When you have finished updating any necessary fields click Modify This Vendor.

Acq_modify_vendor_tab_2.png